Two Tier Eclipse Eggs & Bunny!


I shared this card during my video on Two Tier Eclipse. I love that technique!

The background paper is from the Bright & Beautiful DSP. It looks very Easter/Spring to me! I die cut the second smallest egg twice from it- equal on each side.

Here’s the video explaining the technique:


Measurements:

Basic White 5-1/2″ x 8-1/2″ scored at 4-1/4″

Misty Moonlight 5-3/8″ x 4-1/8″

Bright & Beautiful DSP 5-1/4″ x 4″

Scraps of Basic White (bunny, sentiment & small egg), Misty Moonlight (layers behind the bigger eggs and small egg) and Granny Apple Green (for the chevron on the top & bottom and the small egg).

Product List

Cascading Pleats Notes of Nature Card! Video!

I had so much fun making this card! This card will fit in a regular envelope and it really stands out when on display!


Here’s my video making it:


I have a PDF to print with the measurements on it.  You can see all my instructions on the right side (from a computer) or all the way down (on a phone).


And don’t forget I have PDF Tutorial for Nature’s Sweetness! You can see it here!


Product List

An Easter Wreath with Eggs and a Bunny!


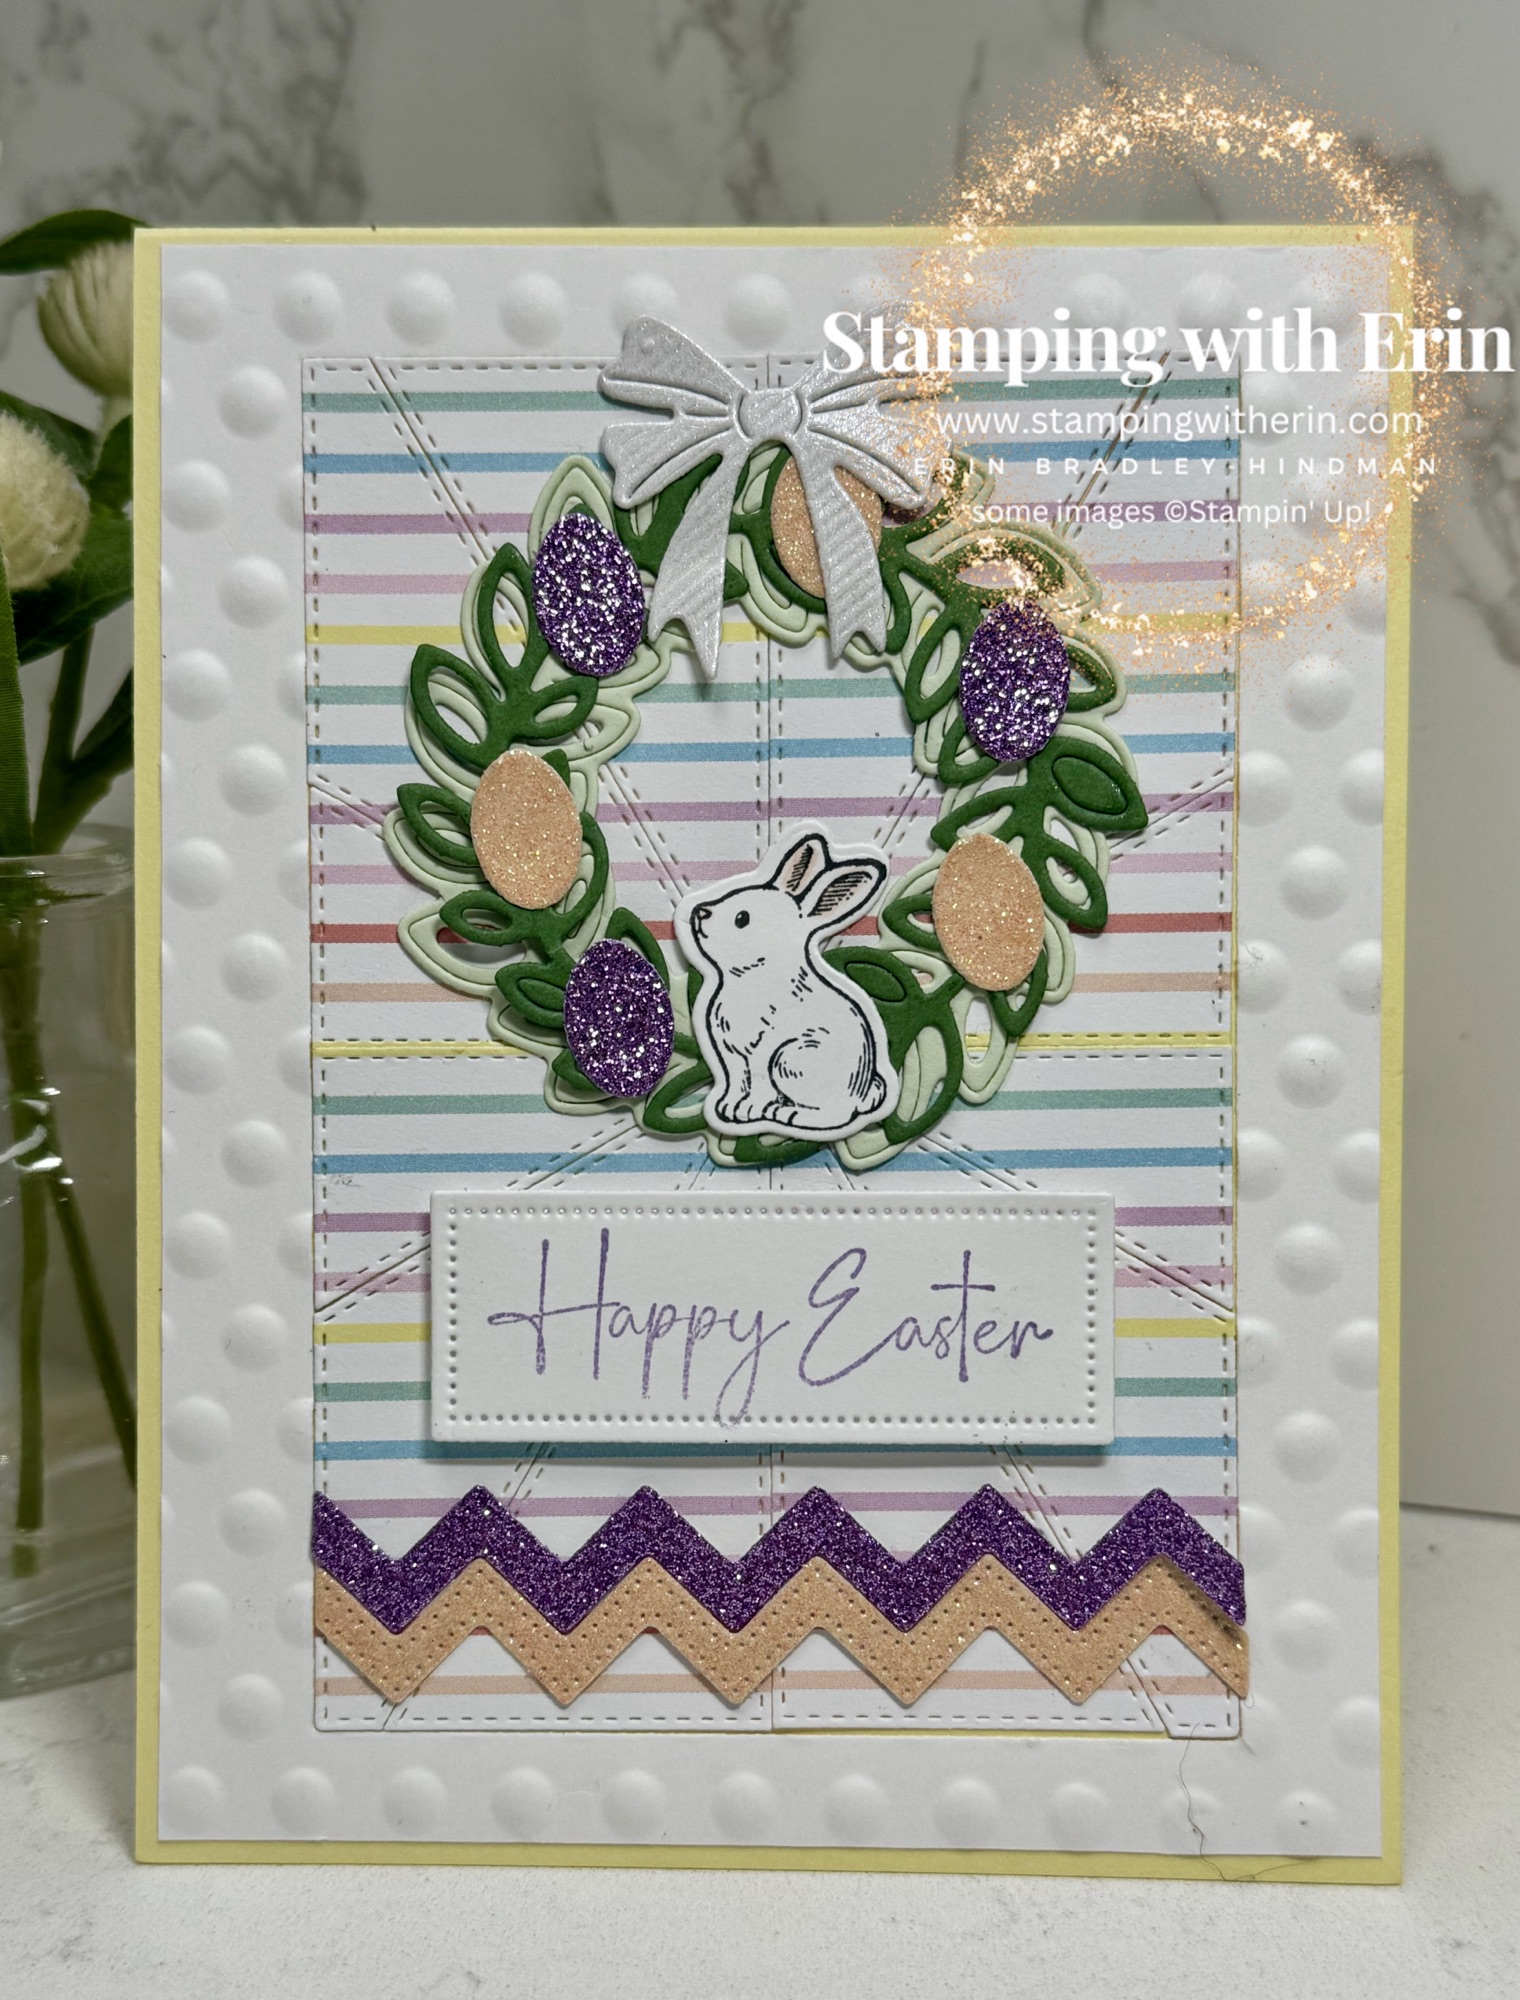
I really wanted to make a card with an Easter Wreath. Since the Excellent Eggs bundle is BIG eggs, I had to pull out a bunch of dies to make it happen.

For the wreath, I die cut the two wreath dies from Country Wreath. One is Soft Sea Foam, one is Garden Green.

The eggs on the wreath are from the Nested Friends dies. I die cut those with the Three Color Glimmer Specialty Paper.

The bow on top is from the Country Wreath dies. I used the Textured Shimmer Paper in White.

That cute little bunny is from Excellent Eggs. I stamped him with Memento and colored his ears and nose with Petal Pink Blends.

The DSP is from Lighter than Air. I die cut it with Patchworks Pieces die. I then die cut a piece of Basic White (5-3/8″ 4-1/8″) and die cut it again, centering. That gave me the frame. I embossed it with the Basic 3D Embossing Folder.

The same paper used for the eggs was used for the bottom chevron pattern- from the Excellent Eggs dies.

I stamped Happy Easter (Excellent Eggs) with Highland Heather on Basic White. I die cut with the smallest rectangle die from Everyday Details. Put it on Dimensionals.

Measurements:

Lemon Lolly 4-1/4″ x 11″ Scored at 5-1/2″

Basic White 4-1/8″ x 5-3/8″

Lighter than Air DSP 4″ x 5″

Scraps of Basic White, Garden Green, Soft Sea Foam

Scraps of Three Color Glimmer Speciality and Textured Shimmer Paper


Product List

Hello Happy Day! Lovely & Sweet in BRIGHT Colors!

I have made SO many cards with the Nature’s Sweetness suite and I wanted to make a few with some bright fun colors. This was my first one. I love it!

When I was embossing/die cutting the “Hello”, a bit of the “oh happy day” die cut, too. It was missing the “oh” and I thought it would be so cute to have the card say “Hello Happy Day!” The sentiment on the inside could be “happy birthday”, “congrats”, “happy graduation”, “happy wedding day” etc!

I stamped the flowers with Memento, die cut, and then colored with Parakeet Party and Lemon Lolly Blends.

The “hello happy day” is Pool Party cardstock. I did at a little bit of Pool Party ink with the Blending Brush on the embossing folder. You can barely see it, but it’s there!

The beautiful background DSP is Nature’s Sweetness. I glued the flowers, then the sentiment. And then I added some Glossy Dots. Pretty fast card!

Measurements:

Basic White 4-1/4″ x 11″ Scored at 5-1/2″

Pool Party 4-1/8″ x 5-3/8″

Nature’s Sweetness DSP 4″ x 5-1/4″

Scraps of Basic White and Pool Party

I have a new PDF Tutorial! It’s for Nature’s Sweetness/Lovely & Sweet/ Notes of Nature (it includes a bright card, too!) All my PDF Tutorials have pictures, measurements, all supplies used and step by step instructions! You can see it here!


Product List

Bees on Wobbles/Craft Springs for a Slimline Birthday Card!

In case you didn’t know, I love making slimline cards. This one was fun- using a ton from the Bee Mine suite. And it’s not a Valentine card!

I stamped the bees three times- Pool Party, Lemon Lolly and Petal Pink. I added the stripes with Versamark and added clear embossing powder. The wings were same colors. Faces and antennas are Memento.

The sun is from the Hey Chuck dies. I used Lemon Lolly. The flowers are from the Paper Florist dies. I used Basic White and colored with Blends.

The sentiment is from the Phrases For All stamp set. I added the dotted lines (from Bee My Valentine stamp set) next to it. All Sweet Sorbet.

The bees are on Wobbles/Craft Springs. It’s really cut when you see them move!

Measurements:

Basic White 8-1/2″ x 7″ Scored at 3-1/2″

Bee Mine DSP (Flowers) 8-3/8″ x 3-3/8″

Basic White (the strip on the bottom) 8-3/8″ x  1-3/8″

Bee Mine (yellow plaid) 8″ x 1″

My Bee My Valentine PDF Tutorial is 4 cards, never shared anywhere else. It includes pictures, measurements, all products used and step by step instructions. You can see it here.

All my PDFs- there are 15 of them! Trusty Tools, Jungle Pals, Gone Fishing, Reach for the Stars (Astronauts), Let’s Go Shopping, Cheerful Daisies and tons for the various holidays- Thanksgiving, Halloween, Christmas and Valentine’s Day. You can see all of them here.

Product List

Happy Easter from a Big Shiny Egg!

I was looking at the Nature’s Sweetness DSP and thought that if I colored some of it it would make a pretty egg!

I colored with Flirty Flamingo, Petal Pink and Shaded Spruce (the light color) Blends. I left some blank. Die cut with the biggest Excellent Eggs die.

For the background (Flirty Flamingo), I did two things:

  1. Using the brayer with White ink, color the logo side of the Painted Posies embossing folder. Emboss.
  2. Using the brayer with Versamark, go over the embossed paper lightly. Add gold embossing powder, heat.

I loved that it made the background look so shabby & different.

I stamped “Happy Easter” on Flirty Flamingo with Versamark. Embossed with gold powder. Die cut with the smallest die in Everyday Details dies.

I tied a bow with the gold Simply Elegant Trim and added to the top left corner of the sentiment with Glue Dots.

Measurements:

Basic White 4-1/4″ x 11″ scored at 5-1/2″

Flirty Flamingo 4-1/8″ x 5-3/8″

Nature’s Sweetness DSP 4″ x 4″ (for the egg)

Scraps of Flirty Flamingo (for the sentiment)


Happy Friday!

Product List

White & Gold Easter Lily- He is Risen!

I was browsing through my DSP and started looking at the beautiful Nature’s Sweetness DSP. It is GORGEOUS! I wanted to put a white lily from the Easter Lilies dies on top.

I die cut the flower with Basic White and the Gold Foil sheets. It looked so pretty already, but I wanted to give it a little more color. Using the Gold Metallic Enamel Effects and a sponge (put some of the Enamel Effects on a Silicone Craft Sheet and lightly pick up with the sponge) I added color to all of the white.

The circle/leaves frame behind it is from the Lifetime of Love dies. I added Enamel to that, too.

The pieces in the top left and bottom right corners are from the Notes of Nature dies. I die cut one piece, cut two pieces out of it and added Enamel to it.

The sentiment is from Easter Lilies. I stamped with Versamark on Basic White, embossed with gold powder and die cut with the Everyday Details die. No Enamel on this- I wanted it to stand out. It’s on Dimensionals.

Measurements:

Pecan Pie 4-1/2″ x 11″ scored at 5-1/2″

Nature’s Sweetness DSP 4″ x 5-1/4″

Scraps of Basic White and Gold Foil


I will have many Easter cards to share! Some are cute and some are like this- the Reason!✝︎


Product List

Have You Heard of Two Tier Eclipse? It’s Really Cool!


I did this technique years ago and forgot all about it! It’s really easy!

You die cut whatever image you want right from the DSP card front. Then die cut it again twice with darker (if the card front is light) or lighter (if the card front is dark) cardstock. Use the same color cardstock that goes behind the card front.

Glue all three together, with the DSP in the front. Put Dimensionals all over the back.

Decorate the DSP card front however you want, then glue to the cardstock. Add your die cut  and viola! Done!

Here’s a short video to show you how:


Measurements:

Basic Black 4-1/4″ x 11″ scored at 5-1/2″

Smoky Slate 4-1/8″ x 5-3/8″

Basic White 4-1/8″ x 5-3/8″ (for the inside of the card)

Rock & Roll DSP 4″ x 5-1/4″

Scraps of Basic White, Smoky Slate, Rock & Roll DSP


Product List

You Make Me Happy!


It’s been fun making bee cards that are not Valentine cards! This cute bee can be used in so many ways!

I stamped the bee with Sweet Sorbet, Daffodil Delight, Petal Pink and Memento.

The heart paper is the Bee Mine DSP. So are the honey jars on the bottom- I fussy cut those.

For the sentiment, I inked up the Thoughtful Moments Hybrid folder with Sweet Sorbet using the Brayer. I used Daffodil Delight cardstock. I die cut a Deckled Rectangle with Basic White and glued the sentiment on top. I added two small flowers.

For the bottom small piece of Basic White (1/2″ x 5-1/4″), I used the Simply Scored tool to emboss at 1/8″.

Measurements:

Basic White 5-1/2″ x 8-1/2″ scored at 4-1/4″

Daffodil Delight 5-3/8″ x 4-1/8″

Bee Mine DSP 5-1/4″ x 4″

Scraps of Bee Mine DSP (for the honey jars)

Scraps of Basic White

Scraps of Daffodil Delight


My PDF Tutorial for the Bee My Valentine has cards for all occasions- and the sentiment can be changed easily! You can see it here. My PDFs are cards I won’t share anywhere else. They include photos, all supplies used, measurements and step by step instructions.


Product List