

Here’s the video:

Here’s the video:
Well, the start of my Live was annoying, and then after another annoying thing happened. If you watched, sorry! I tried not to get mad about it and the making of the card was with no problems.
Here’s my edited YouTube video:
Let me know if you have any questions!
Product List
|
|
|
|
|
|
|
|
|
|||
|
|
||||
|
|
|
|
|
|
|
|
|
|

Well, I hope my video last night was ok! Sorry for the camera movement! This was my first, so I learned a few things so next week will be better!
I uploaded the live video to YouTube. Edited it a little and labeled where each technique starts.
Here’s all the supplies used:
Product List

Aren’t these eggs pretty? This technique can be used for lots of cards! (I show other cards in the video- but it’s all retired stuff 🥲) I have a few more to share soon!
Here’s my video:
If you saw the AWESOME glue bottle I use for intricate die cuts, you can find the link on my “Must Have for Crafting”. It’s at the top (on a computer) or under Menu on a phone.
Measurements:
Basic White 5-1/2″ x 8-1/2″ scored at 4-1/4″
Fresh Freesia 5-3/8″ x 4-1/8″
White Center Specialty Paper (Fresh Freesia) 5-1/4″ x 4″
Soft Sea Foam 5-1/4″ x 1/2″
Vellum Specialty Paper 6″ x 4″
Basic White 6″ x 4″
Scraps of Fresh Freesia
Product List
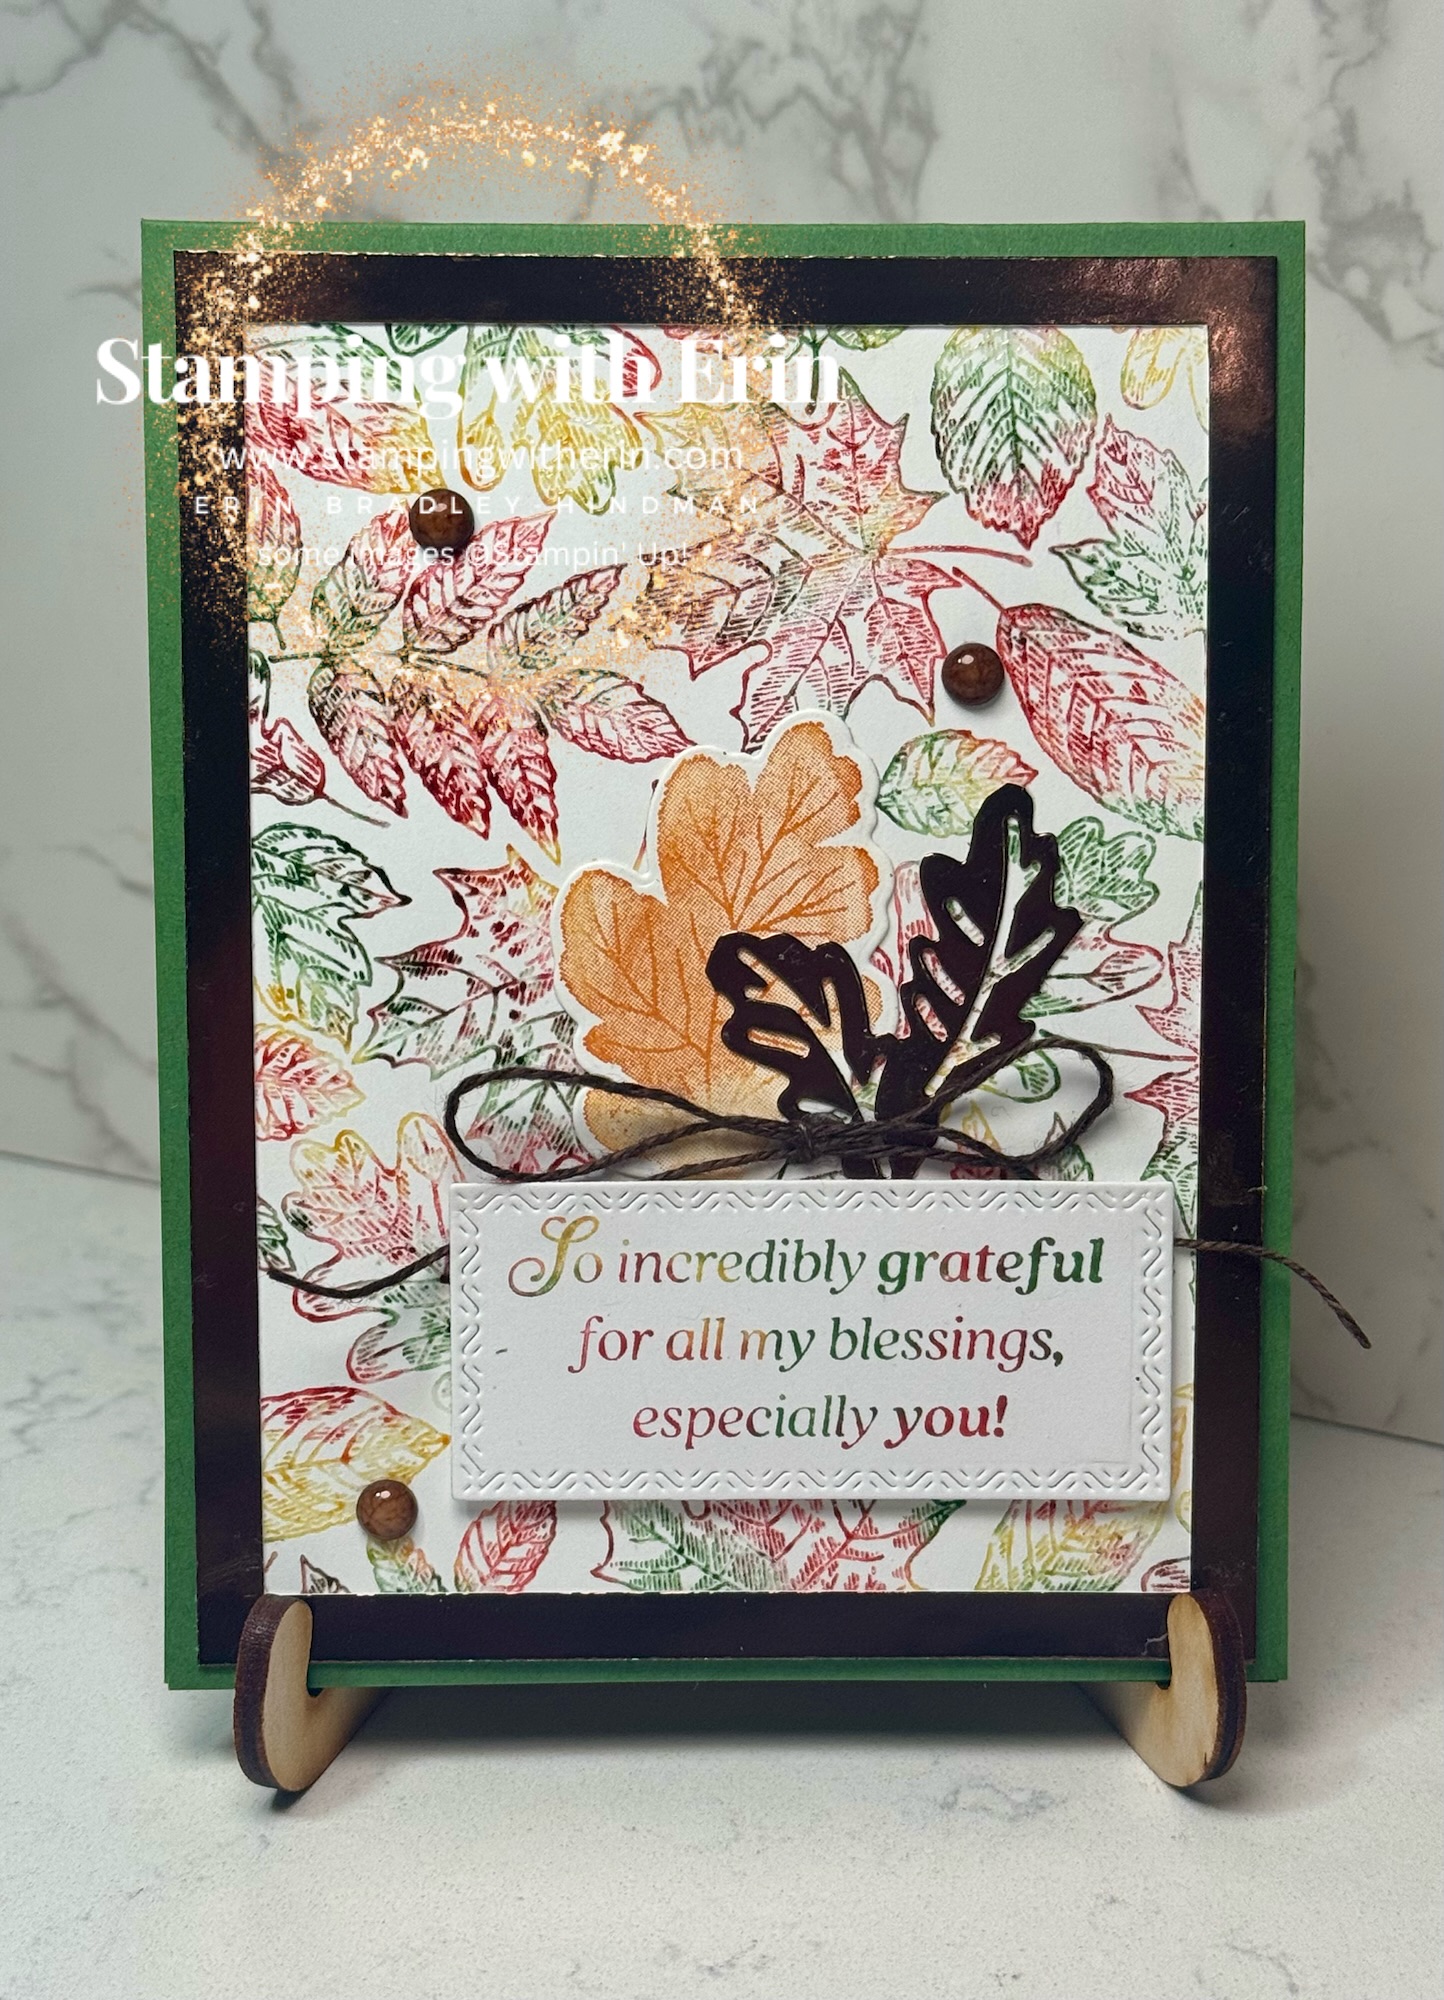
I did this technique years ago and forgot all about it! It’s really easy!
You die cut whatever image you want right from the DSP card front. Then die cut it again twice with darker (if the card front is light) or lighter (if the card front is dark) cardstock. Use the same color cardstock that goes behind the card front.
Glue all three together, with the DSP in the front. Put Dimensionals all over the back.
Decorate the DSP card front however you want, then glue to the cardstock. Add your die cut and viola! Done!
Here’s a short video to show you how:
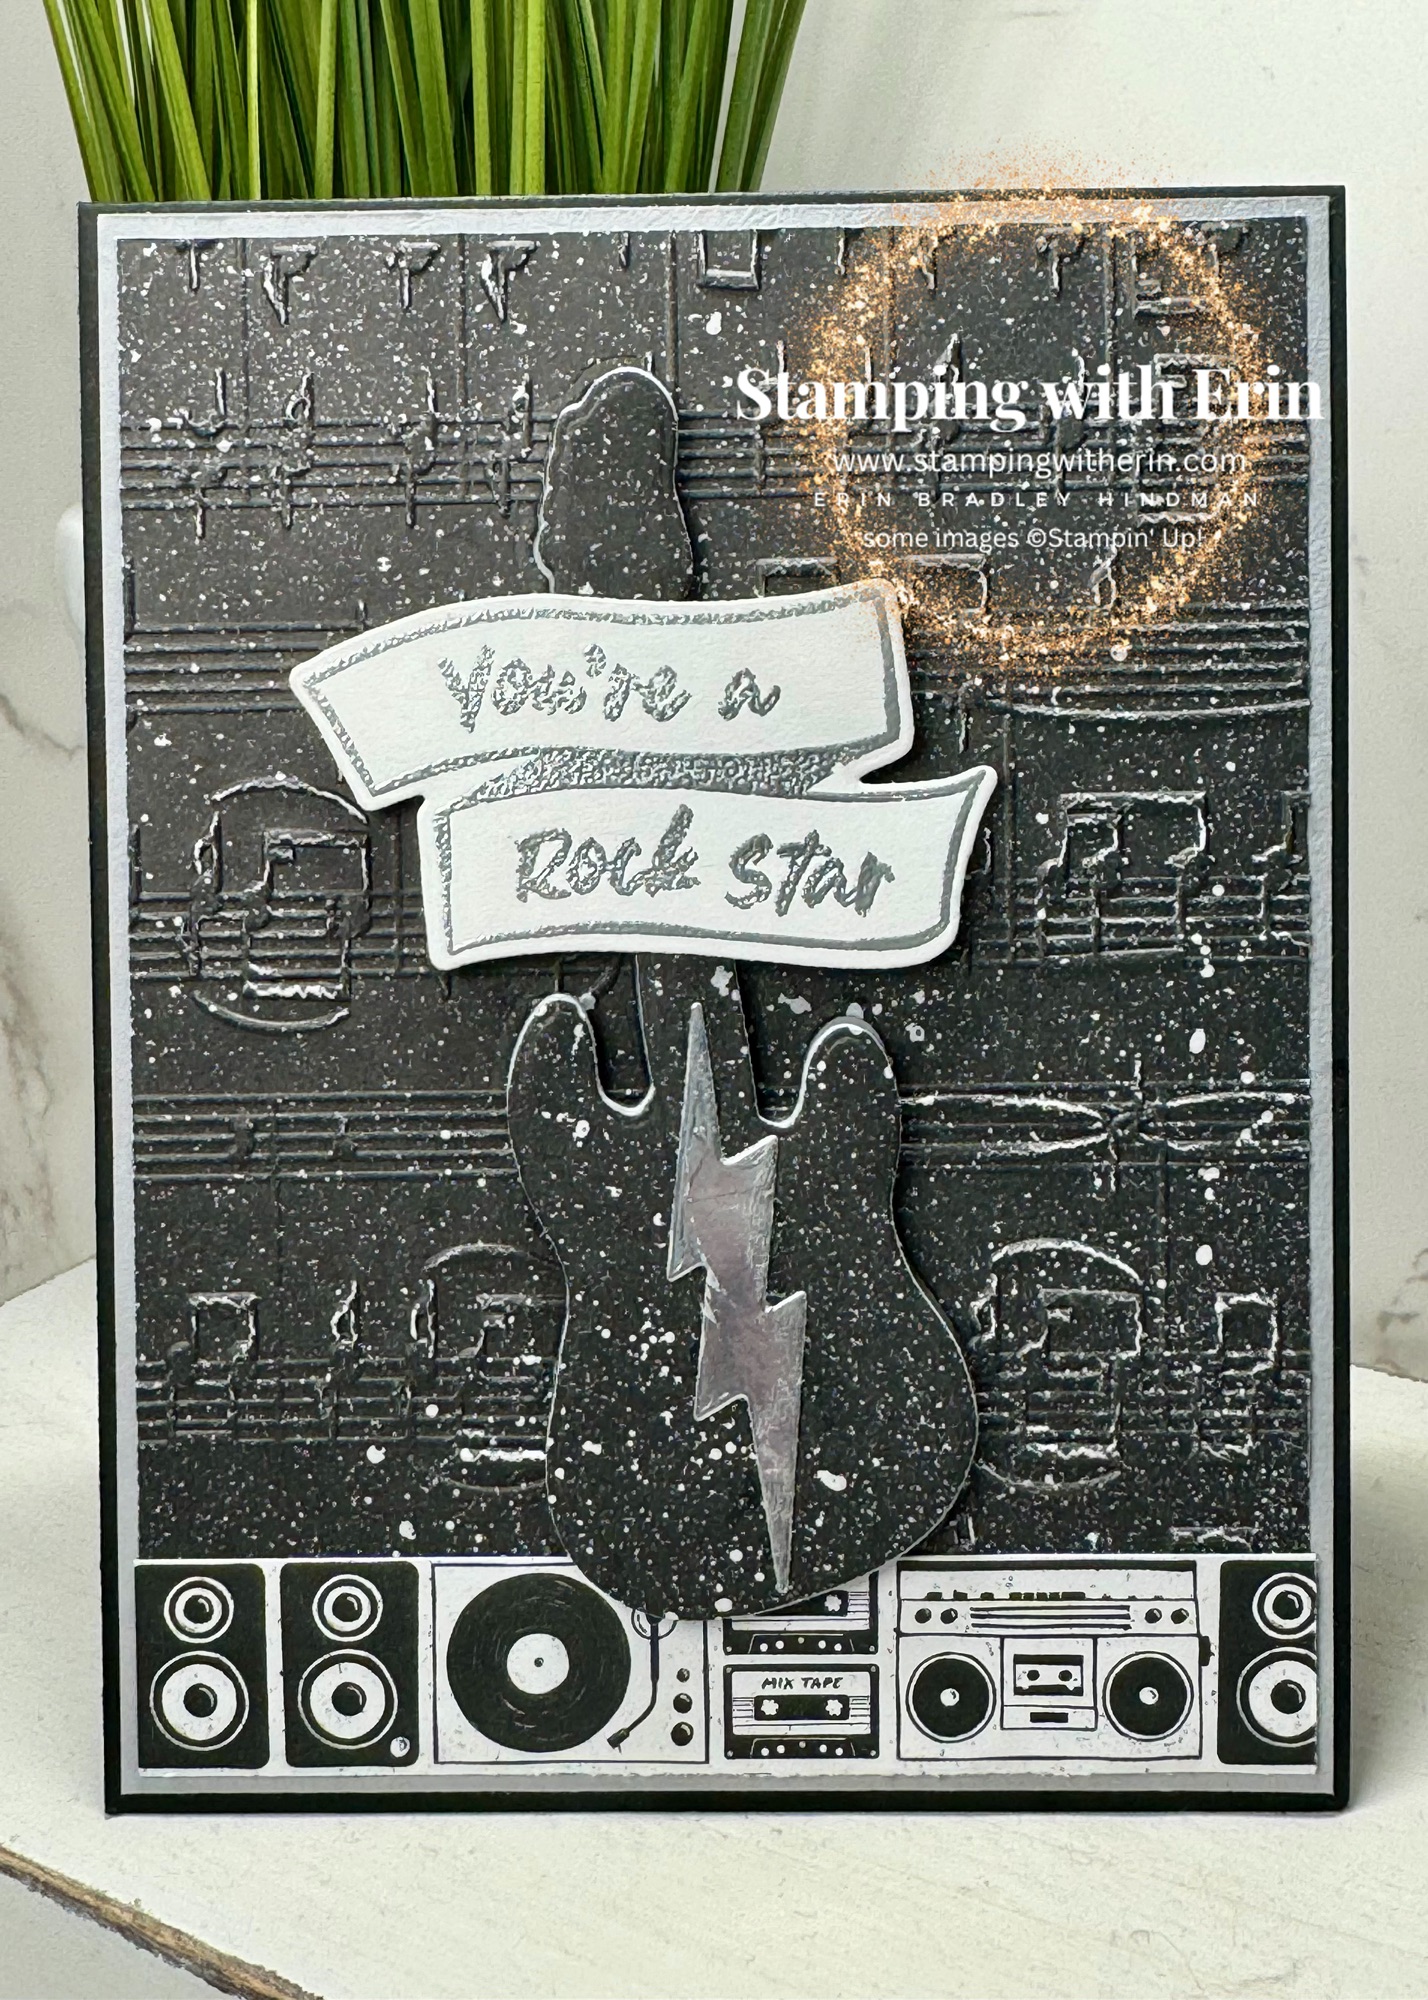
Measurements:
Basic Black 4-1/4″ x 11″ scored at 5-1/2″
Smoky Slate 4-1/8″ x 5-3/8″
Basic White 4-1/8″ x 5-3/8″ (for the inside of the card)
Rock & Roll DSP 4″ x 5-1/4″
Scraps of Basic White, Smoky Slate, Rock & Roll DSP
Product List

How cute is this white tiger? I love white tigers- they are so beautiful!
I stamped the tiger with Versamark on Basic White and embossed him with silver embossing powder.
The circle behind the tiger is one of the new dies, the Everyday Details dies. Page 28 of the mini.
I embossed with the Cheery Patterns Embossing folders. When I made the card, the Cheery was still available. It’s not anymore. Sorry about that, but lots of embossing folders would work!
I stamped “happy birthday” from the Beach Days stamp set on the inside.
The “Oh Happy Day!” is from the Thoughtful Moments Hybrid Embossing Folder (page 18). Using a brayer, I put some Versamark on the folder, die cut and then added silver embossing powder and heat set.
For the background, I did the same thing. I added Versamark to the logo side, embossed and then added silver embossing powder.
I decided to see what it would look like if I put the Versamark on the non-logo side. ↓↓↓↓↓↓↓↓↓↓

So, here they are side by side. Totally different!

Here’s my video showing how to use that AWESOME brayer!
Measurements:
Basic White 5-1/2″ x 8-1/2″ scored at 4-1/4″
Basic Black 5-3/8″ x 4-1/8″
Smoky Slate (1st card) Basic White (2nd card) 5-1/4″ x 4″
Scraps of Basic White
Scraps of Smoky Slate
Scraps of Basic Black
Don’t forget I have a PDF Tutorial for 4 cards using the Jungle Pals! I won’t share those anywhere else! You can see it HERE!
Product List

I made a Double Fold card with the motorcycle on it earlier this year. I looked at the Merriest Trees and decided I wanted to make another one- a little different.
Here’s the inside:

And here’s a short video of the card being opened:
Here’s my video making it- and you get to see the 4 cards I have in the Merriest Trees PDF Tutorial!
Here’s all the measurements for this card- you can also see the PDF for the Double Fold Card under my “instructions” on the right side or on the bottom from a phone.
Card Base: 5-1/2″ x 11″ Scored at 4″ and 8-1/4″
Snow DSP: 3-3/4″ x 5-1/4″
Balmy Blue Shimmer: 5-3/8″ x 3-7/8″ Die cut with the Deckled Rectangles dies to make a frame.
Shaded Spruce Shimmer below trees: 5-1/2″ x 3/8″
Snow DSP inside the card below the trees: 1/4″ x 5-1/4″
Product List

How about a double fold card using the Ready to Ride suite/ Legendary Ride bundle?
I saw a card on a demo Facebook Page that was a double fold that was so pretty. She used Rays of Light and the Mountain Air stamps and dies. I decided I wanted to make one but wanted to make it a little different.
This is what it looks like when opened:
I was selling cards at a Vendor Fair last week and a few people asked me if I had more man cards. I did not. So, on my list of things to do was to make men cards!
I was looking through my stuff deciding what to use. I saw the motorcycle and I was like- “that would be a really cool card!”
The size of this card is 5-1/2″ x 11″. Scored at 4″ and 8-1/4″.
The DSP is 3-3/4″ x 5-3/8″ on the top where the sentiment is.
On the bottom, below the motorcycle, the DSP is 1″ x 5-1/2″.
Inside there are two pieces of DSP- on the top and bottom. Both are 1-5/16″x 5-1/2″.
Here’s my full video:
I have a short one on Pinterest, Facebook, Instagram, and TikTok!
Here’s everything I used!
Product List
")


")


If you watched my last video, on the pop & twist (fold) cards, this is one of the ones I made!
Here’s the inside:

I love that these cards can have lots of embellishments, stamped images, etc!
Here’s my video on how to make these:
You can find the PDF of instructions on the left hand of my site (from a computer) or at the very bottom (on a phone).
Here’s everything I used:
Product List
")


![Etched Autumn Cling Stamp Set [ 166082 ]](https://i0.wp.com/assets1.tamsnetwork.com/images/EC042017NF/166082s.jpg?w=120&ssl=1 "Etched Autumn Cling Stamp Set [ 166082 ]")
![Gathering Moments Bundle (English) [ 165980 ]](https://i0.wp.com/assets1.tamsnetwork.com/images/EC042017NF/165980s.jpg?w=120&ssl=1 "Gathering Moments Bundle (English) [ 165980 ]")
![Words For The Season Cling Stamp Set (English) [ 165716 ]](https://i0.wp.com/assets1.tamsnetwork.com/images/EC042017NF/165716s.jpg?w=120&ssl=1 "Words For The Season Cling Stamp Set (English) [ 165716 ]")
![Amber Autumn Dies [ 165892 ]](https://i0.wp.com/assets1.tamsnetwork.com/images/EC042017NF/165892s.jpg?w=120&ssl=1 "Amber Autumn Dies [ 165892 ]")
![Textured Notes Dies [ 165555 ]](https://i0.wp.com/assets1.tamsnetwork.com/images/EC042017NF/165555s.jpg?w=120&ssl=1 "Textured Notes Dies [ 165555 ]")
![Earthen Toned Metallic 12" X 12" (30.5 X 30.5 Cm) Specialty Paper [ 165901 ]](https://i0.wp.com/assets1.tamsnetwork.com/images/EC042017NF/165901s.jpg?w=120&ssl=1 "Earthen Toned Metallic 12\" X 12\" (30.5 X 30.5 Cm) Specialty Paper [ 165901 ]")
![Basic White 8 1/2" X 11" Cardstock [ 166780 ]](https://i0.wp.com/assets1.tamsnetwork.com/images/EC042017NF/166780s.jpg?w=120&ssl=1 "Basic White 8 1/2\" X 11\" Cardstock [ 166780 ]")
![Garden Green 8-1/2" X 11" Cardstock [ 102584 ]](https://i0.wp.com/assets1.tamsnetwork.com/images/EC042017NF/102584s.jpg?w=120&ssl=1 "Garden Green 8-1/2\" X 11\" Cardstock [ 102584 ]")
![Streaked Dots [ 165902 ]](https://i0.wp.com/assets1.tamsnetwork.com/images/EC042017NF/165902s.jpg?w=120&ssl=1 "Streaked Dots [ 165902 ]")
![Early Espresso & Old Olive Linen Thread Pack [ 165986 ]](https://i0.wp.com/assets1.tamsnetwork.com/images/EC042017NF/165986s.jpg?w=120&ssl=1 "Early Espresso & Old Olive Linen Thread Pack [ 165986 ]")
![Real Red Classic Stampin' Ink Refill [ 103287 ]](https://i0.wp.com/assets1.tamsnetwork.com/images/EC042017NF/103287s.jpg?w=120&ssl=1 "Real Red Classic Stampin' Ink Refill [ 103287 ]")
![Garden Green Classic Stampin' Ink Refill [ 102059 ]](https://i0.wp.com/assets1.tamsnetwork.com/images/EC042017NF/102059s.jpg?w=120&ssl=1 "Garden Green Classic Stampin' Ink Refill [ 102059 ]")
![Daffodil Delight Classic Stampin' Ink Refill [ 119672 ]](https://i0.wp.com/assets1.tamsnetwork.com/images/EC042017NF/119672s.jpg?w=120&ssl=1 "Daffodil Delight Classic Stampin' Ink Refill [ 119672 ]")
![Pumpkin Pie Classic Stampin' Pad [ 147086 ]](https://i0.wp.com/assets1.tamsnetwork.com/images/EC042017NF/147086s.jpg?w=120&ssl=1 "Pumpkin Pie Classic Stampin' Pad [ 147086 ]")
![Versamark Pad [ 102283 ]](https://i0.wp.com/assets1.tamsnetwork.com/images/EC042017NF/102283s.jpg?w=120&ssl=1 "Versamark Pad [ 102283 ]")
![Basics Wow! Embossing Powder [ 165679 ]](https://i0.wp.com/assets1.tamsnetwork.com/images/EC042017NF/165679s.jpg?w=120&ssl=1 "Basics Wow! Embossing Powder [ 165679 ]")
![Multipurpose Liquid Glue [ 110755 ]](https://i0.wp.com/assets1.tamsnetwork.com/images/EC042017NF/110755s.jpg?w=120&ssl=1 "Multipurpose Liquid Glue [ 110755 ]")
![Mini Glue Dots [ 103683 ]](https://i0.wp.com/assets1.tamsnetwork.com/images/EC042017NF/103683s.jpg?w=120&ssl=1 "Mini Glue Dots [ 103683 ]")
![Stampin' Dimensionals [ 104430 ]](https://i0.wp.com/assets1.tamsnetwork.com/images/EC042017NF/104430s.jpg?w=120&ssl=1 "Stampin' Dimensionals [ 104430 ]")
![Mini Stampin' Dimensionals [ 144108 ]](https://i0.wp.com/assets1.tamsnetwork.com/images/EC042017NF/144108s.jpg?w=120&ssl=1 "Mini Stampin' Dimensionals [ 144108 ]")
![Heat Tool (Us And Canada) [ 129053 ]](https://i0.wp.com/assets1.tamsnetwork.com/images/EC042017NF/129053s.jpg?w=120&ssl=1 "Heat Tool (Us And Canada) [ 129053 ]")
![Paper Trimmer [ 152392 ]](https://i0.wp.com/assets1.tamsnetwork.com/images/EC042017NF/152392s.jpg?w=120&ssl=1 "Paper Trimmer [ 152392 ]")
![Stampin' Cut & Emboss Machine [ 149653 ]](https://i0.wp.com/assets1.tamsnetwork.com/images/EC042017NF/149653s.jpg?w=120&ssl=1 "Stampin' Cut & Emboss Machine [ 149653 ]")
")
")
")


")
")
")


 Specialty Paper")
 Specialty Designer Series Paper")


")


")
")


 Designer Series Paper")
 Specialty Paper")


")
")


")
")


 Designer Series Paper")
 Shimmer Paper")
")
 Specialty Designer Series Paper")


 Specialty Designer Series Paper")


